As you know, you can sync your iPhone in either of two ways: by using Apple’s iCloud online service, or by using your computer.
iCloud is arguably the wave of the future, and it’s a great way to keep your music and other content synced among your iPhone, your computer, and other iOS devices you have (for example, an iPad or an iPod touch). In fact, you don’t even need a computer—you can do it all with your iPhone or other iOS devices.
However, if you have a large collection of music and videos, or if you have a poky or unreliable Internet connection, you’re probably better off syncing with your computer. Apple has got you covered here—you can download the latest version of iTunes, install it on your PC or Mac, and get your iPhone syncing underway inside a few minutes.
But what if you want to load content onto your iPhone from multiple computers rather than a single one?
Apple has designed your iPhone and iTunes to assume you’ll be syncing all your information from a single computer. This is what many people—perhaps most—will do. But given that you’re reading this book, you’re most likely among those special ones who want to load your iPhone from multiple computers.
This project shows you how to do that. We’ll start with the limitations.
Understand What You Can and Can’t Sync
Here’s what you need to know about syncing your iPhone with multiple computers:
• Your iPhone can sync only with a single iTunes library at a time. So if you sync your desktop’s iTunes library with your iPhone, you can’t then sync your laptop’s iTunes library without wiping the desktop library from your iPhone.
• The iTunes library includes music, movies, TV shows, ringtones, podcasts, and books. To sync any of these items with the iTunes library of a computer other than your iPhone’s home computer’s iTunes library, you must wipe out your iPhone’s existing library.
• Apps are separate from the iTunes library, but you can sync only one computer’s set of apps to an iPhone. This can be a different computer than the computer whose iTunes library you’re syncing for music, movies, and so on. Syncing apps with another computer removes all the existing apps from your iPhone. (Not the built-in apps—you’d need a virtual bulldozer to shift those.)
• Photos are also separate from the iTunes library you’re using for syncing music, but you can sync photos from only one computer with your iPhone. Syncing photos with another computer removes your iPhone’s existing photos (but not any photos or videos in your iPhone’s Camera Roll).
• The items that appear on the Info tab of your iPhone’s control screens—contact information, calendar information, mail accounts, bookmarks, and notes—are also handled separately from music. When you start to sync your iPhone’s information items with another library, you can choose between merging the new information with the existing information and simply replacing the existing information.
• You can tell iTunes that you want to manage your iPhone’s music and videos manually. After you tell iTunes this, you can connect your iPhone to a computer other than its home computer and add music and videos to it from that computer. But if you switch your home computer’s library back to automatic syncing, you’ll lose any music and videos you’ve added from other computers.
• For copyright reasons, iTunes puts limitations on which music and video files you can copy from your iPhone to a computer. For example, you can’t connect your iPhone to your friend’s computer and copy all the songs from your iPhone to the computer. See the sidebar at the end of this project for instructions on working around this limitation—for example, to recover your iTunes library after your computer crashes.
Set your iPhone to Sync Data from Multiple Computers
Now that you understand the restrictions on syncing, let’s look at how to set your iPhone to sync data from multiple computers rather than a single computer.
When you set your iPhone to sync music or photos with another computer, the initial sync may take hours, because of the amount of data involved. By contrast, syncing information (contacts, calendars, and so on) usually takes only seconds, and syncing apps takes a few minutes, depending on how many apps there are and how chunky their developers have made them.
Sync All Your iPhone’s Data with Its Current Computer
Before you start making changes, connect your iPhone to its current home computer and run a sync. This makes sure that you have a copy of the latest information from your iPhone on your computer in case you need it later.
Change the iTunes Library your iPhone Is Syncing Music with
To change the iTunes library your iPhone is syncing music with, follow these steps:
1. Connect your iPhone to the computer that contains the music you want to sync.
2. Click your iPhone’s entry in the Devices category of the Source list in the iTunes window to display its control screens.
3. Click the Music tab to display the Music screen.
4. Select the Sync Music checkbox.
5. Use the controls to specify which music you want to sync (see Figure 1). For example, either select the Entire Music Library option button to sync the whole library (assuming your iPhone has enough room for it), or select the Selected Playlists, Artists, Albums, And Genres option button and then select the check box for each item you want to include.
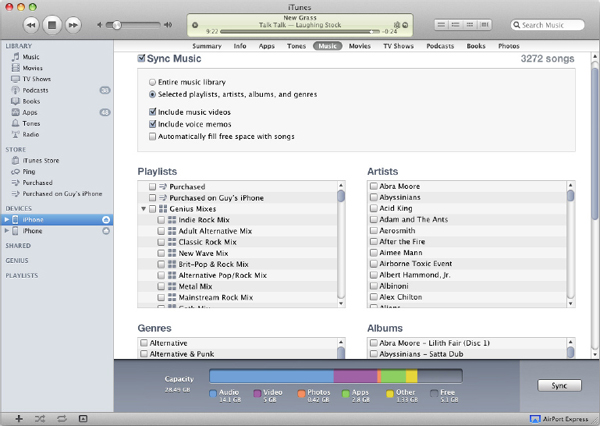
FIGURE 1 On the Music screen, choose whether to sync all the music in your library or only the playlists, artists, albums, and genres whose checkboxes you select.
At this point, you can also choose sync settings for the other items that changing the music library will affect: ringtones, movies, TV shows, podcasts, and books.
6. Click the Apply button, which replaces the Sync button when you make changes. iTunes displays a dialog box asking if you want to erase and sync the library, as shown here.
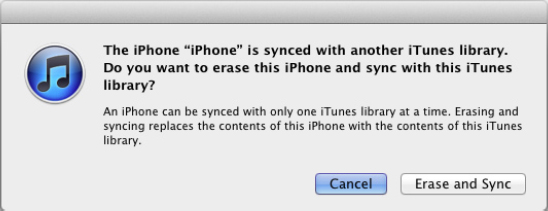
7. Click the Erase and Sync button. iTunes replaces the existing library items on your iPhone with the items you chose from the new library.
Change the Computer Your iPhone Is Syncing Information With
To change the computer your iPhone is syncing contacts, calendars, mail accounts, and other information with, follow these steps:
1. Connect your iPhone to the computer that contains the information you want to sync.
2. Click your iPhone’s entry in the Devices category in the Source list in the iTunes window to display its control screens.
3. Click the Info tab to display the Info screen (see Figure 2).
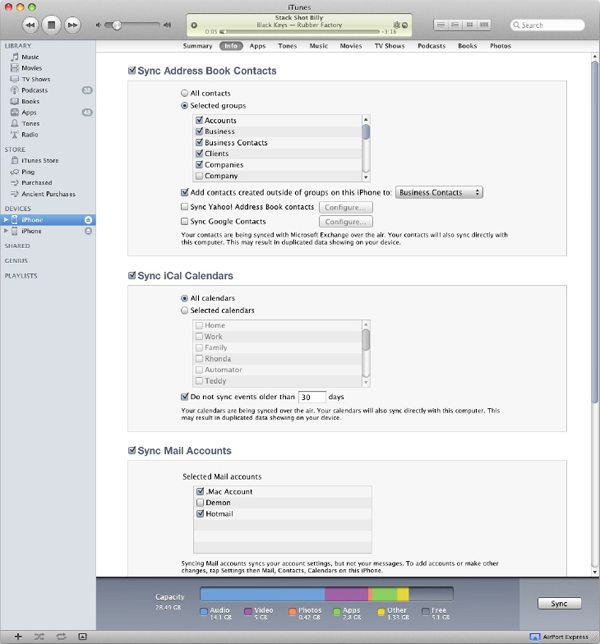
FIGURE 2 On the Info screen, choose which contacts, calendars, mail accounts, bookmarks, and notes to sync from your computer to your iPhone.
4. Select the appropriate check boxes. For example, on a Mac, select the Sync Address Book Contacts check box, the Sync iCal Calendars check box, and the Sync Mail Accounts check box; and select the Sync Safari Bookmarks checkbox and the Sync Notes checkbox in the Other box as needed.
5. Use the controls in each box to specify which items you want to sync. For example, select the check box for each mail account to sync in the Selected Mail Accounts list box.
6. Click the Apply button, which replaces the Sync button when you make changes. iTunes displays a dialog box (shown here) that offers you the choice between replacing the information on your iPhone and merging the new information with the existing information.
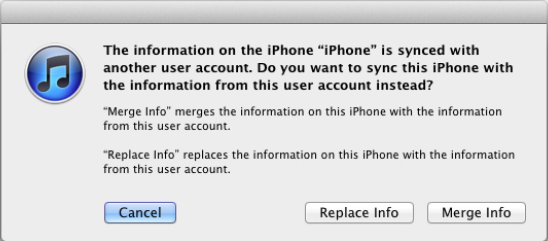
7. Click the Replace Info button if you want to replace the information, or click the Merge Info button if you want to merge the old information and new information.
Change the Computer Your iPhone Is Syncing Apps With
To change the computer your iPhone is syncing apps with, follow these steps:
1. Connect your iPhone to the computer that contains the apps you want to sync.
2. Click your iPhone’s entry in the Devices category of the Source list in the iTunes window to display its control screens.
3. Click the Apps tab to display the Apps screen (see Figure 3).
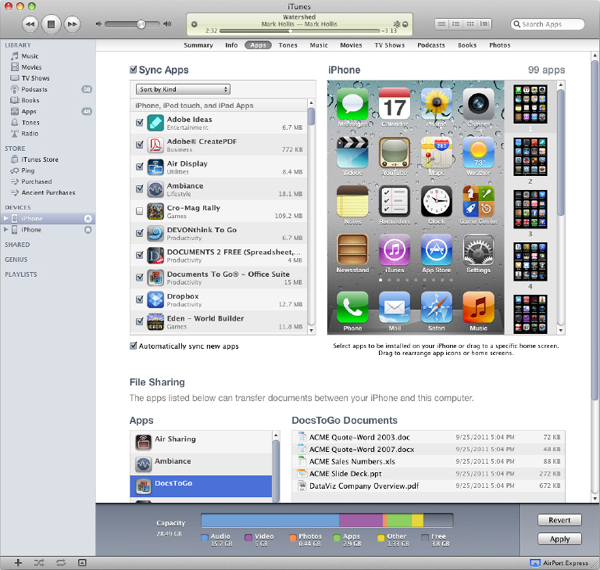
FIGURE 3 On the Apps screen, choose which apps to sync with your iPhone.
4. Select the Sync Apps checkbox.
5. In the list box, clear the check box for each app you don’t want to sync. These check boxes are all selected by default.
6. Select the Automatically Sync New Apps check box if you want iTunes to automatically sync new apps with your iPhone. (This is usually helpful.)
7. Click the Apply button. iTunes displays a dialog box (shown here) to confirm that you want to replace all your iPhone’s apps with the apps in this computer’s iTunes library.
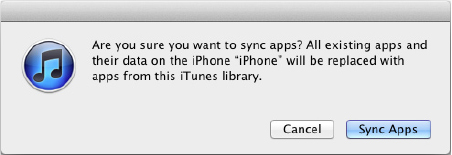
8. Click the Sync Apps button. iTunes syncs the apps.
Change the Computer Your iPhone Is Syncing Photos With
To change the computer your iPhone is syncing photos with, follow these steps:
1. Connect your iPhone to the computer that contains the photos you want to sync.
2. Click your iPhone’s entry in the Devices category of the Source list in the iTunes window to display its control screens.
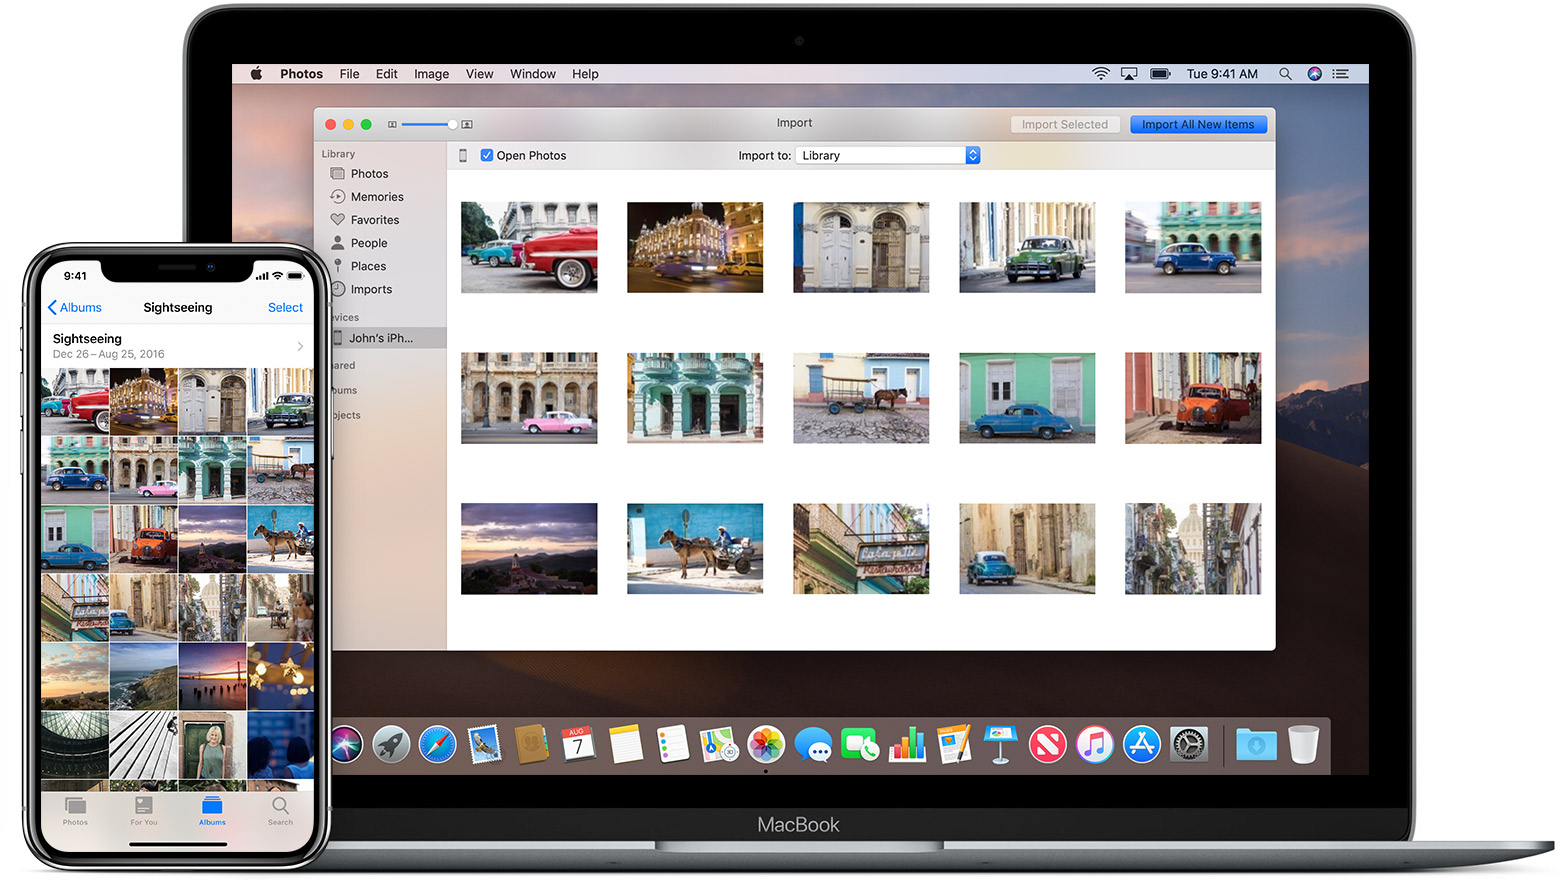
3. Click the Photos tab to display the Photos screen (see Figure 4).
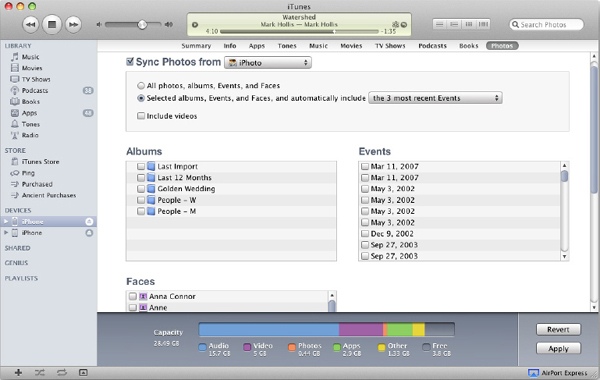
FIGURE 4 On the Photos screen, choose which photos to sync with your iPhone.
4. Select the Sync Photos From check box.
5. In the Sync Photos From the drop-down list, choose the source of the photos. For example, choose the Pictures folder on Windows or choose iPhoto on Mac OS X.
6. Use the controls to specify which photos to sync. For example, select the All Photos, Albums, Events, And Faces option button if you want to sync all the photos (assuming they’ll fit on your iPhone). Or select the Selected Albums, Events, And Faces, and Automatically Include option button, choose a suitable item in the drop-down list, and then select the checkbox for each album, event, and face you want to sync.
7. Click the Apply button. iTunes displays a dialog box (shown here) to confirm that you want to replace the synced photos on your iPhone.
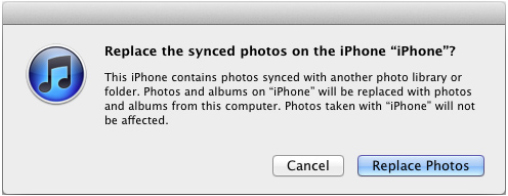
8. Click the Replace Photos button. iTunes replaces the photos.
If you’re using a Mac, you can use iPhoto or Image Capture to copy photos from your iPhone to your Mac. Use iPhoto when you want to gather your photos into Events, edit them, and manage them in iPhoto. Use Image Capture when you just want to get the photos (or screen captures, or saved images) from your iPhone into your Mac’s file system.
DOUBLE GEEKERY
Recover Your Songs and Videos from Your iPhone
When you sync your iPhone with your computer, any songs and videos on your iPhone are also in your library on your computer, so you don’t need to transfer the songs and videos from your iPhone to your computer. This includes the songs and videos you purchase on your iPhone from the iTunes Store. But if you have a computer disaster, or if your computer is stolen, you may need to recover the songs and videos from your iPhone to your new or repaired computer.
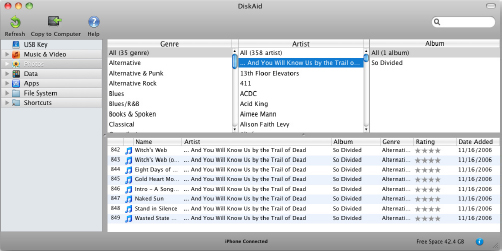
To recover songs and videos from your iPhone, you need a utility that can read your iPhone’s file system. To help you avoid losing your music and videos, iPhone enthusiasts have developed some great utilities for transferring files from your iPhone’s hidden music and video storage to a computer.
At this writing, several utilities are available for copying your music and videos from your iPhone to your computer. The best utility for both Windows and the Mac is DiskAid from DigiDNA ($24.90; www.digidna.net; trial version available). DiskAid (shown next) reads your iPhone’s library database and displays its contents so that you can easily copy them back to a computer.